Pyrus requests from WhatsApp messages
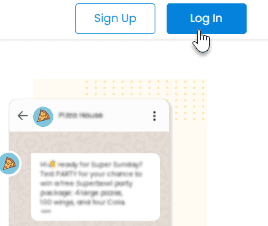
If your clients write to you on WhatsApp, you can conveniently process their messages in Pyrus. Any incoming message from your client instantly appears in your Inbox as a new task.
Want to analyze WhatsApp requests in a report or register? You can set up Source fields to auto-fill, and easily filter information this way.
Pyrus Tip: this extension is set up through the paid service GupShup: https://www.gupshup.io/, an official partner of Facebook.
Step I. Setting up a business account with Facebook
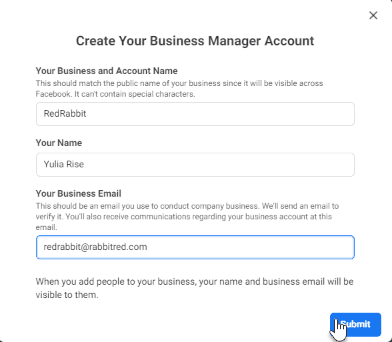
The first thing you need to do is set up a business account with Facebook Business Manager. If you already have one, go to Step 2.
Pyrus Tip: to create a business account, you need an active regular Facebook account. To start, log into Facebook, then click this link and press the Create an account button in the upper right corner of the screen.

Fill in the required fields and hit Send.
Then, follow Facebook’s instructions to go through all the steps of verifying your business account. Read in more detail about how to do this here.
Step II. Creating an app in GupShup
Go to https://www.gupshup.io/ and click on Log In in the upper right corner.
Pyrus Tip: Make sure you have Admin rights in your business account on Facebook Business Manager.
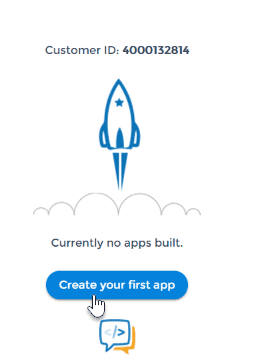
On the page that opens, click Create your first app. This launches the process of creating a new app.
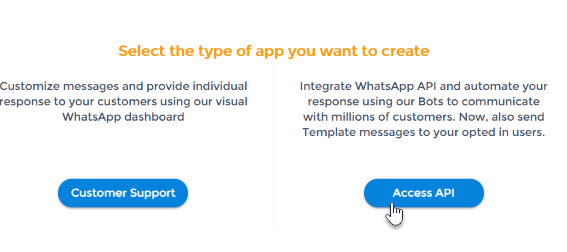
Select Access API to create a bot for communicating with your clients through WhatsApp.
Select a name for your app and hit Send.
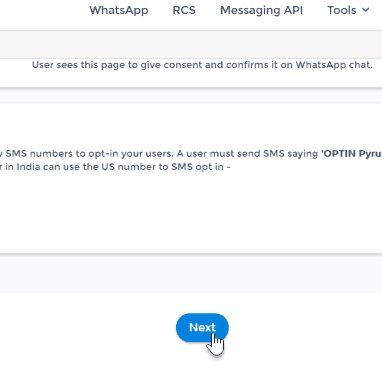
At the bottom of the page that opens, click Next.
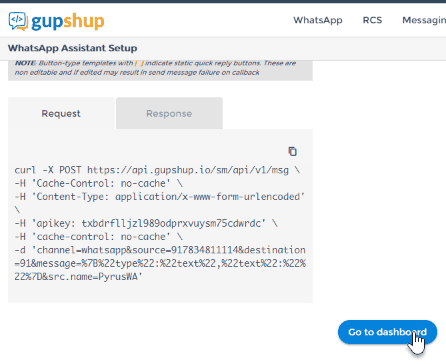
Then, press the Go to Dashboard button to access your control panel.
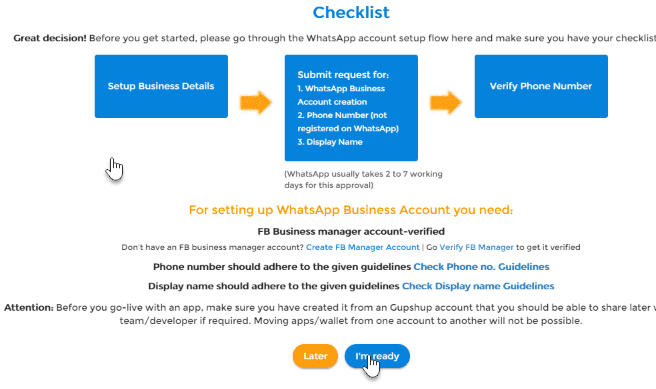
Activate a chat for communicating with clients.

Read what the process of creating a business account in WhatsApp entails, and confirm that you are ready to start.
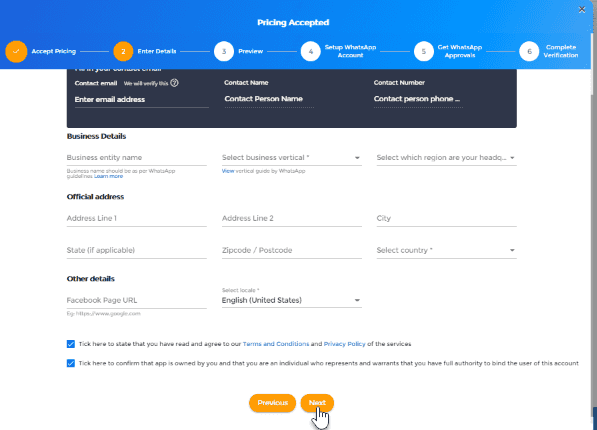
Enter the required information about your company in the field that opens.
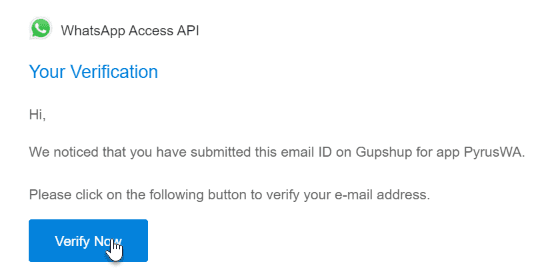
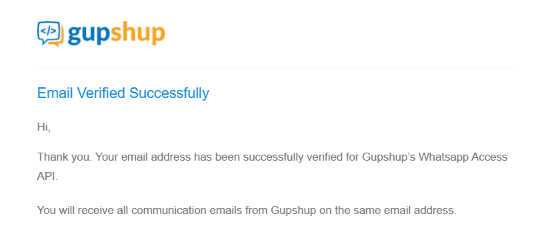
GupShup will send you a verification email, to the address you indicate in the form. Press the Verify Now button in the body of the email.
Once your account is verified, an Email Verification Complete window will open, and a confirmation will be sent to your email.
Next, enter the ID of your company, which is now verified with Facebook Business Manager. Hit Save.
Pyrus Tip: you can copy the ID from https://business.facebook.com/settings/info
Follow the instructions to enter the phone number you plan to use for your WhatsApp Business API.
Pyrus Tip: make sure you are familiar with the rules for choosing a phone number for this purpose.
Now, in your Facebook Business Manager account, confirm your connection to GupShup. To do this, open this link in a new browser window: https://business.facebook.com/settings/requests. In the Received section, you will find a request from GupShup, which you will need to approve.
Go back to GupShup and confirm that you have approved the request in Facebook Business Manager.
You’ll see a message that your request has been sent and is awaiting approval by WhatsApp, which may take between 2 and 7 business days. Sometimes, requests are approved within minutes.
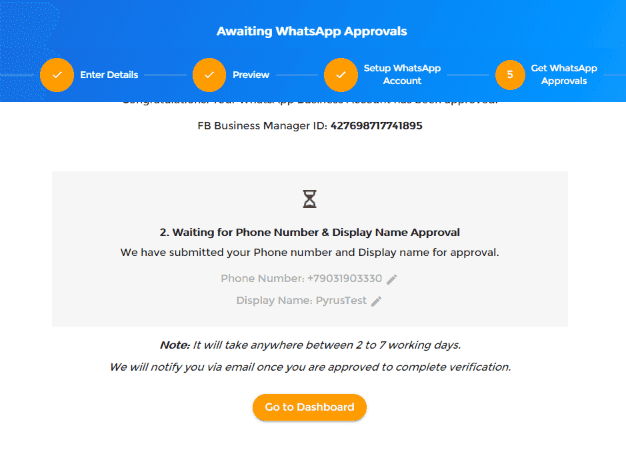
Until your request is approved by WhatsApp, Awaiting Approval status will be displayed in your app’s page in GupShup.

Once approved, you will receive an email from GupShup and the status in the blue button will change to Complete Verification. Press the button.
Then, follow instructions to confirm your phone number.
Pyrus Tip: if it’s a mobile number, the confirmation will be done by text message; if it’s a landline, you will receive a call.
Once your phone number is confirmed, the verification is complete. A green LIVE status will appear across from the name of your app. You can now use your phone number as a WhatsApp Business API, which means you can now receive client requests through WhatsApp as Pyrus tasks. All that’s left to do is attach the extension to Pyrus.
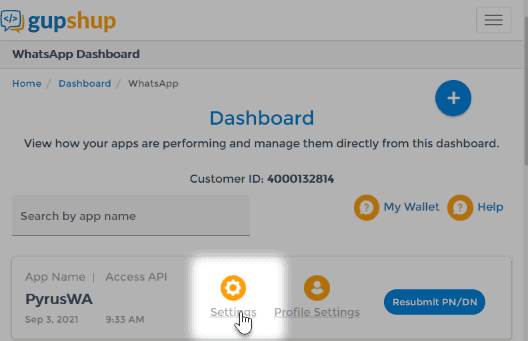
Pyrus Tip: in the application settings, you can set the language your bot will communicate with clients in WhatsApp. Open Dashboard and click Setting.
 Choose language. Here you can turn off the automatic sending of notifications to users.
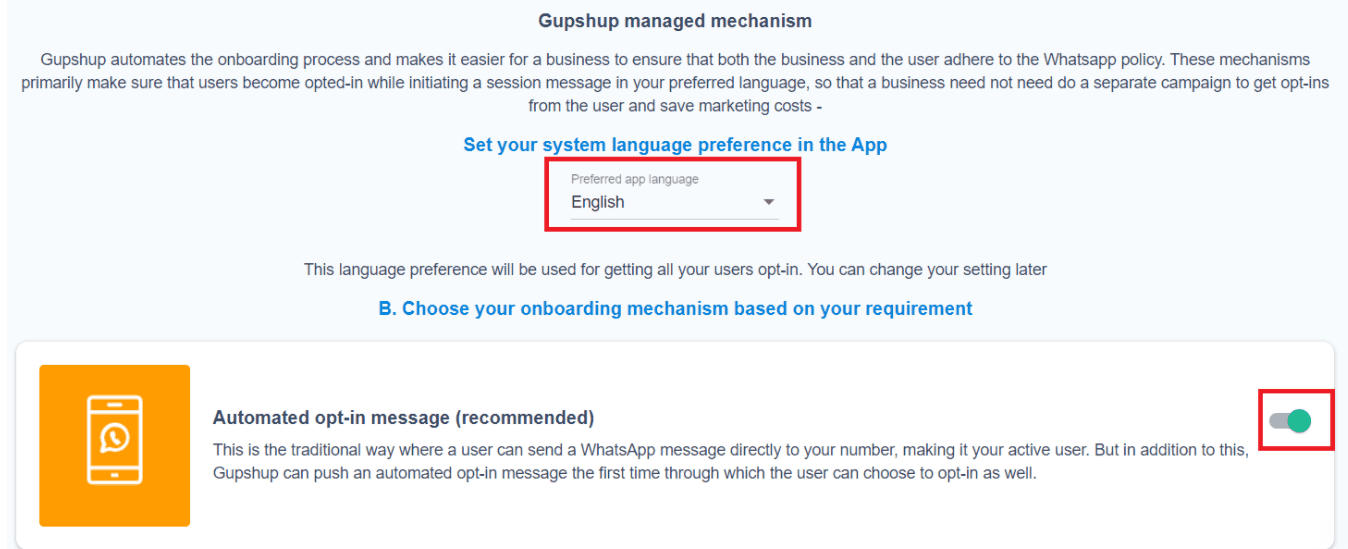
Step III. Attaching the extension to Pyrus
Go into the user settings section in the lower left corner of the screen. Select Extensions.
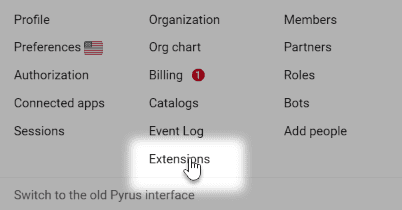
Important! To access the Extensions section from a user profile, you need organization Administrator, or Integrations Manager rights.
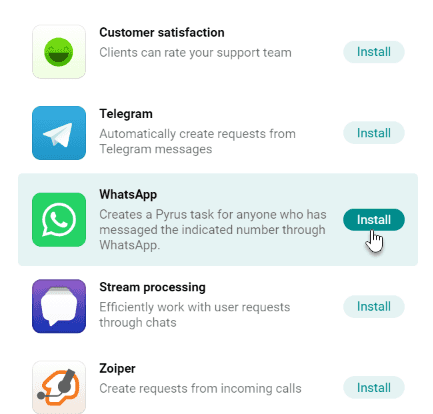
In the extensions list that opens, click on WhatsApp.
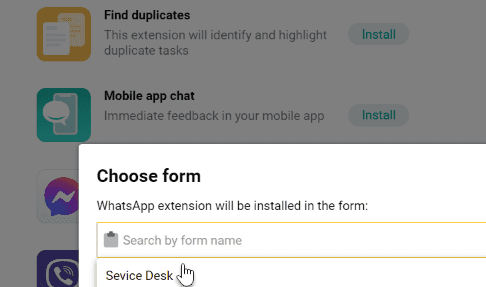
Select the Pyrus form to which you want to connect the WhatsApp requests.
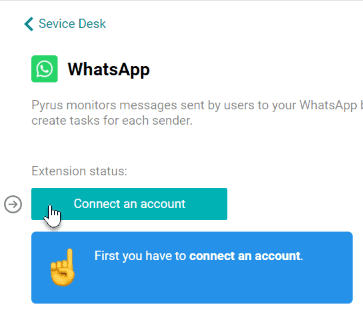
On the extensions page, click Connect an account.
Enter the information from GupShup: the WhatsApp phone number your clients will write to, the name of the app and the API token.

Pyrus Tip: you can copy your API token by clicking on the avatar in the upper right corner of your account page in this service.

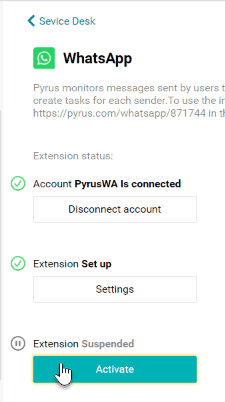
The GupShup account has been attached, now go to the extension settings.
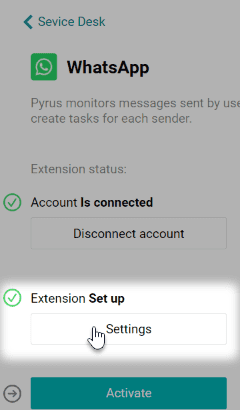
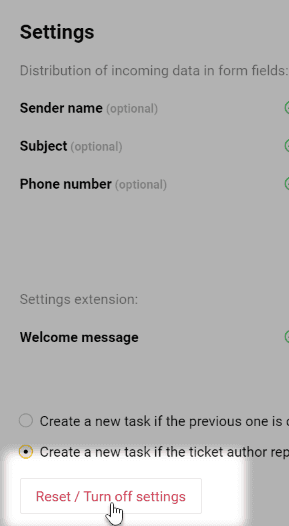
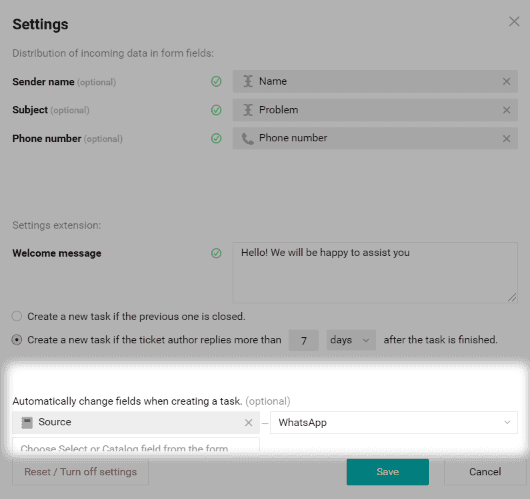
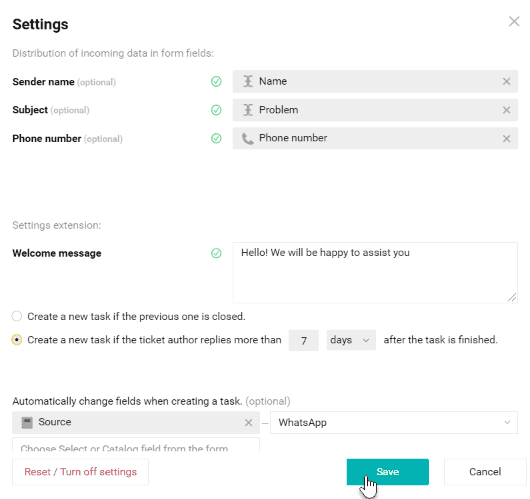
Here, you can tie the name of the client who sent the request and the topic of their message to the form fields, create a greeting the client will receive when they write to you on WhatsApp, set up the conditions from repeat messages from your client to turn into new requests, and set up automatic recording of the request source for further analysis.
Activate your extension.
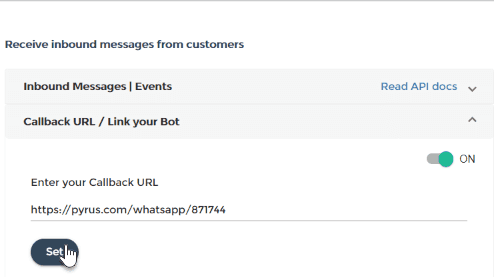
When you attach an extension to Pyrus, this link will appear.

You need to add it in the settings of your GupShup app to finalize connecting Pyrus to WhatsApp.
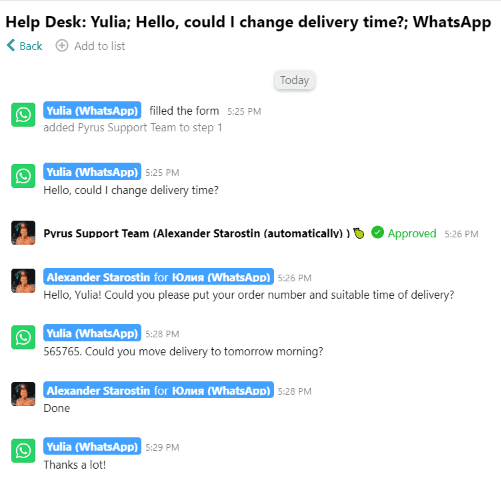
All set! Now you will receive client requests from WhatsApp as Pyrus tasks. To reply right from the task, click the green icon at the upper right part of the comments block and type your message. 
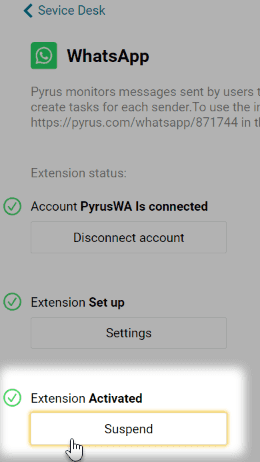
Suspending or deleting the extension
To pause the generating of Pyrus tasks from client messages sent to WhatsApp, go to the Extensions block on the WhatsApp page and click the Suspend button.
To delete the integration altogether, go into the extension settings and click Reset settings/Delete.