Web form
You can publish your service ticket form on your website or send it directly to your clients. Your support team will receive every ticket in Pyrus.
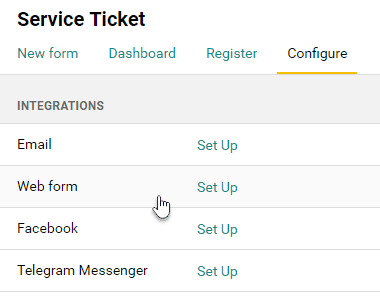
- Open the form configuration page and go to the Integrations section.
- Click on Set Up next to Web form.
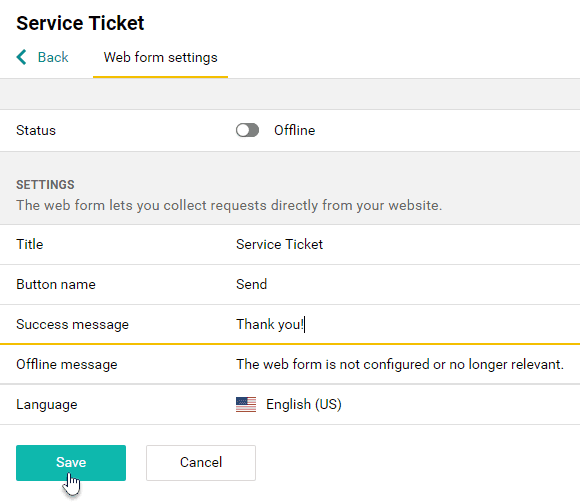
- Under Settings, you can set the form’s title, its button name, and the messages that users will see after submitting their request. Save your changes.
 You’ll find a direct link to the form in the Link section below. You can send it to a client or post it on social media. The form will be available on a separate page. This is a quick and easy way to get feedback without publishing the form on your website. See a form example.
- Enable the web form by clicking on the toggle switch.

- Farther down the page, in Embedded Code, you’ll find code that makes the form work. You can copy and paste this code into the webpage where you want the form to appear.
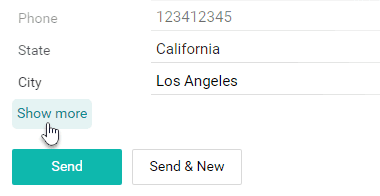
Pyrus Tip: If your form contains fields your clients don’t really need to see, drag them to Processing in the template editor. 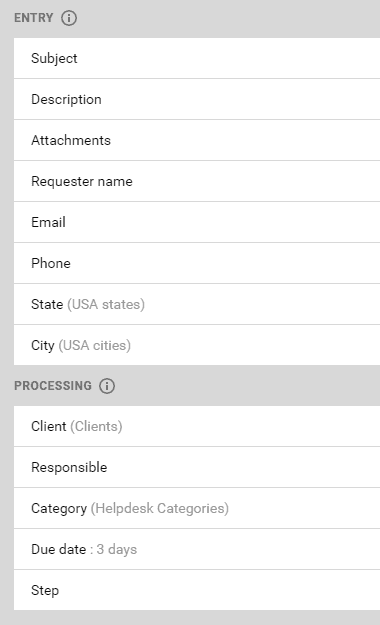 They won’t be displayed in the web form, but the help desk specialist will be able to access them if necessary. To see these fields, click on Show more.