Register
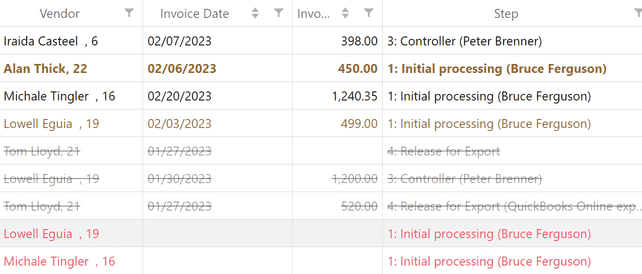
The Register is a list of all of a certain form. Each workflow has its own register, showing the form fields, their values, and the current step for each task. Just like in the Inbox list, the row color refers to the current task status: overdue, archived, due today, etc. When all workflow steps are completed, the request is archived.
You can access the register by clicking the button on the panel in the Forms list. 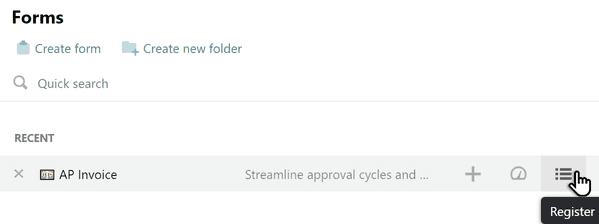
Users without Supervisor and Configuration Manager rights can only see tasks they have access to.
Filters
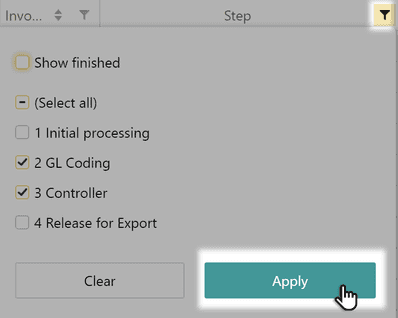
You can use filters to quickly search tasks in the register by due date, participants, vendors, and more. You can also search for all tasks on a certain step, such as invoice requests waiting to be cleared.
You can search the register for several Catalog or Contact field values at once. For example, you might want to see what kind of help requests came from your most valuable clients. Open the Client column, select the names of interest from the dropdown menu, and hit Apply.
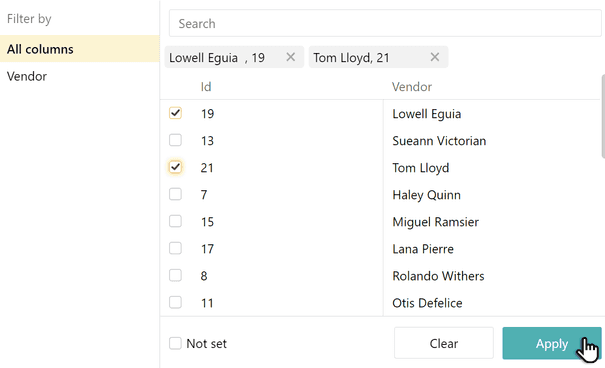
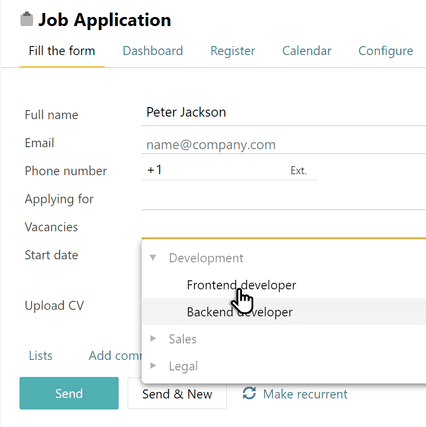
The register will then show the requests sent in by these clients, all in one place. Furthermore, if there’s a multi-column catalog in your form, you can search the register for specific catalog columns. Let’s say a form called Job Application had a catalog of vacancies:
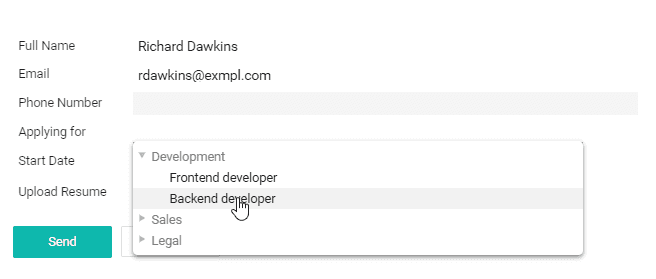
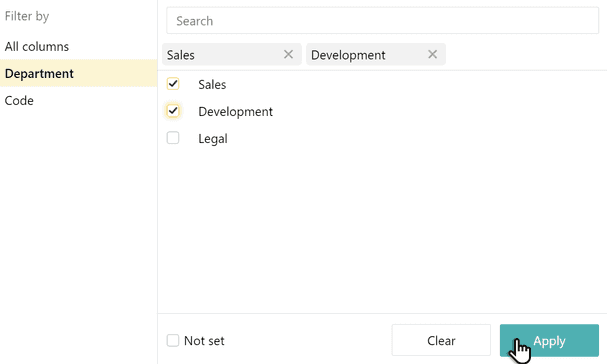
When you filter the form’s register, you can choose All columns to see every application for a specific position like “frontend developer.” Alternatively, you can choose Departments to see how many job applications were sent to a specific department, like sales or development.
You can choose more than one column value for your search.
Sorting
To organize analytical information and quickly analyze amounts, timeframes and contract payouts, deals made, invoices, etc., you can sort requests in the register with fields like Money, Date, Number, Text.
Just open the register, and tap the icon with two arrows in the column you need (like Due Date). Pyrus sorts the requests from highest value, to lowest.
Monitoring deadlines
The register shows you whether your employees have missed any deadlines. If the form has a Due date field, its register contains the columns Overdue and Finished date, so you’ll be able to see whether the task was overdue, even if it’s finished. You can use this to check whether any of your important clients were affected by the support team’s poor time management.
Click on the Overdue column, filter the register by currently overdue tasks, and hit Apply.
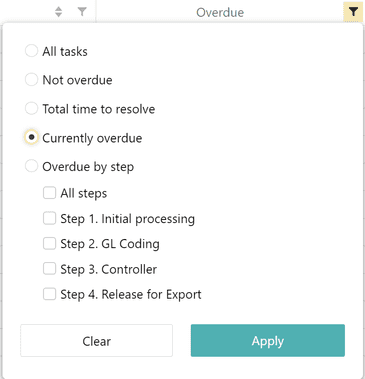
The register will show you all the requests that were not currently processed .
Configuring columns
You can customize the column layout to more easily navigate a form’s register. For example, you might move the most relevant columns to the top and move less important columns out of sight.
To do this, go to Columns.
Let’s take a service ticket form as an example. When you’re taking stock of your help requests, you’re generally less interested in phone numbers and email attachments than in knowing the incident and the affected client. You can customize your columns accordingly.
Drag the less-important columns to Hidden so that they disappear from the register. Then drag the more important columns, like Subject, Description, Category, Step, and Client, to the top of the Displayed list. You’ll immediately see the changes at the bottom of the page.
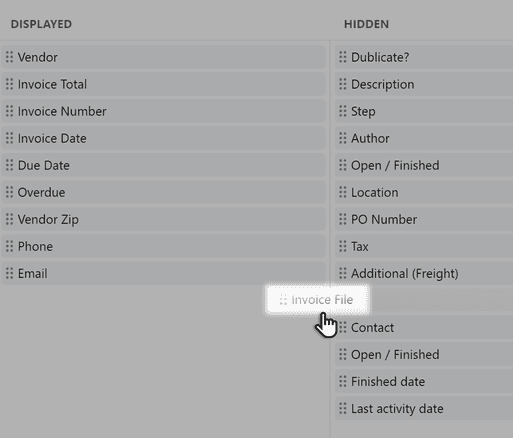
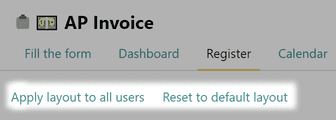
Only you see these changes. To restore the original layout, click Reset to default layout.
A form administrator can customize the register layout that every user sees it by default. To do this, click Apply layout to all users.
Sometimes it’s convenient to configure register for a specific team. You can edit the layout and share a link with your colleagues. To get that link, click Export >> Copy link.
Your colleagues will see your settings. To save it for further use, click Columns and Update my layout. 
Group Actions
You can to approve, mark as read, disagree, reopen, or finished several tasks at once.
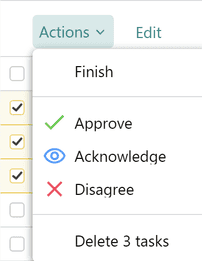
You can also edit the definition of one or more fields at a time, by grouping tasks.
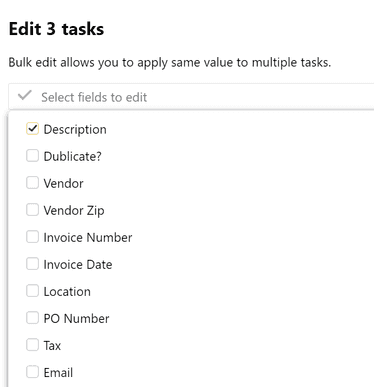
Pyrus Tip: users who work with large databases — client lists, invoices, user inquiries — often need to change the status of several requests in one go. For example, you might need to transfer a group of clients into a different category. This is easy to do in editing mode in the register.
Exporting a register
If you want to use Pyrus data in your accounting software or ERP system, you can save the register as a XLSX or CSV file. Click Export to download the contents of all columns, including the hidden ones.
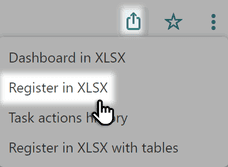
If a register contains 5,000 lines or fewer, it will be exported as an Excel file. A register with more than 5,000 lines will be saved as a CSV file.
Pyrus Tip: To export any register as a CSV file, add a parameter to the link. Right-click on icon with three dots and copy the link address. Paste the link into the browser address bar and at the end of the link, add
&filetype=csv&encoding=utf-8&delimiter=;
. The link will look like
https://pyrus.com/xlsx/forms?ProjectId=xxxxxx&tz=180&od=true&dm=0&filetype=csv&encoding=utf-8&delimiter=;
- filetype=csv — this designates filetype.
- encoding=utf-8 — this designates character encoding. You can also use windows-1251.
- delimiter=; — this is a field separator. Press Enter and the CSV file will be downloaded to your computer.
You can limit access to downloading the register in two ways. In the form settings, you can create a rule that the requests register from it is read only, but cannot be downloaded. To do this, go into the settings, set the appropriate check mark, and click Save.

You can also limit access to the forms register for each employee, in their profile settings. There are three options:
- to prohibit the employee to download the register of all forms they have access to;
- to prohibit the employee to download the register of forms in whose settings a limit on the downloading of the register is set;
- to permit the employee to download the registers of all forms they have access to.
Note: if a rule is set up in the user’s profile that permits them to download forms registers, limits set in the settings of that form will not work. Likewise, if the employee’s access rights, which limit their access to downloading the register, are set up in their profile, the lack of limits in the form settings will not permit them to download the register.
To select the right option in your colleague’s profile, go into the Members section.

Click Edit profile.

In the Privileges section, put a checkmark next to the desired setting and click Save.

Task actions history
With this function, you can see all the steps and approval of any form request — sequence, dates, deadlines, etc. — in a compact and intuitive layout.

The report shows the time spent on each task at each stage, and enables you to receive various statistical data for analysis of processes using spreadsheets or an outside data storage.
To download the report, go into the forms register, click Export, and select Task Actions History.