Print templates
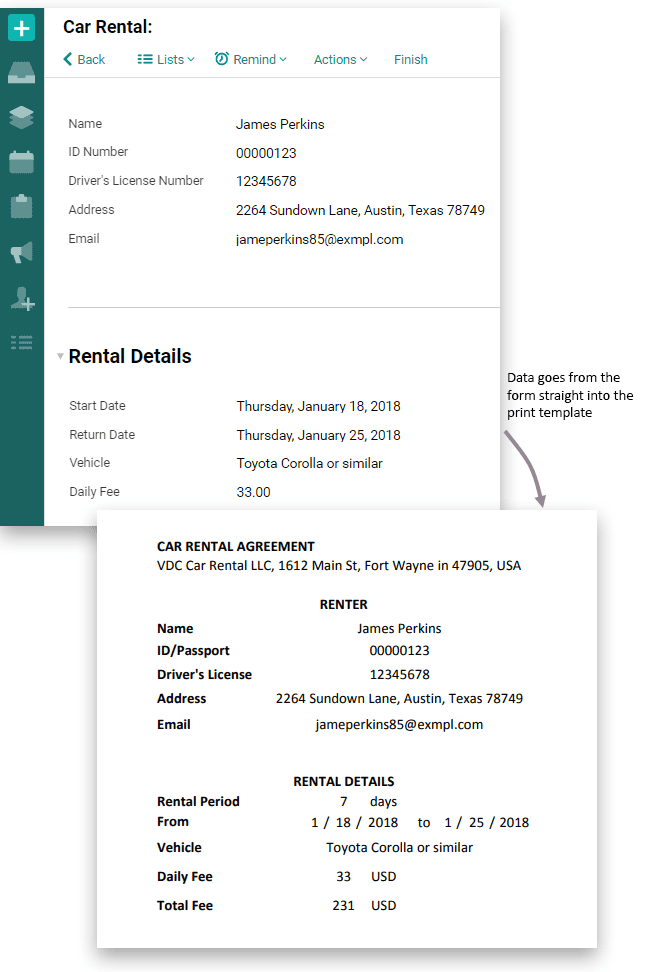
You may often need to provide hard copies of contracts, certificates, and other standard documents. They are easily printed from Pyrus forms using print templates. All the data you enter into the form, like dates or client details, will be automatically transferred to the print version of the document. This means you won’t waste time looking for the right document templates, or entering data by hand. Here are a few examples of how print forms can be used:
- A visitor fills out an external form, like a loan application, on your website. The form comes to you as a task in Pyrus. A manager opens the task, which contains the data the visitor entered, and prints out the form for signing right from the task.
- A manager interacts with a potential client and enters his details into a client ID form. When it’s time to sign the contract, the manager prints it with a single click, the client’s details already in place.
- A client places an order, so the manager fills out an order request form in Pyrus and prints the invoice straight from the form.
Adding a print template
It takes just a few minutes to configure a print template in Pyrus, and you only have to do it once. You need a document template in DOCX or XLSX format and a corresponding Pyrus form.
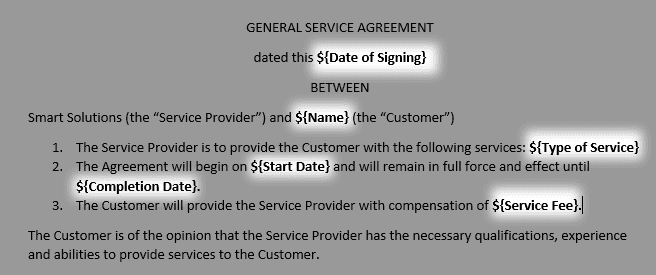
Suppose we created a template for a service agreement and a form called Service Agreement. The goal is to convert filled-out forms into completed documents that contain all the dates, prices, and client details in the appropriate places.
To fill out the template with data from the form, add ${Field type} variables to the template where they’re needed:
Note: You can add task ID ${taskid} to a printed template to request necessary information by task number. This is convenient if you regularly generate and print many documents of the same type (powers of attorney, for example). In this case, it is important to quickly identify the document participants without reading the text.
If the form contains a Catalog type field, and you need its value to autofill in the print template, the variable will be in the format ${Field name:1} where 1 is the number of the catalog column that contains the selected element. For example, if an employee timesheet form contains a Catalog type field where employees specify the branch they were working on, they select the branch from a multi-column branch catalog.
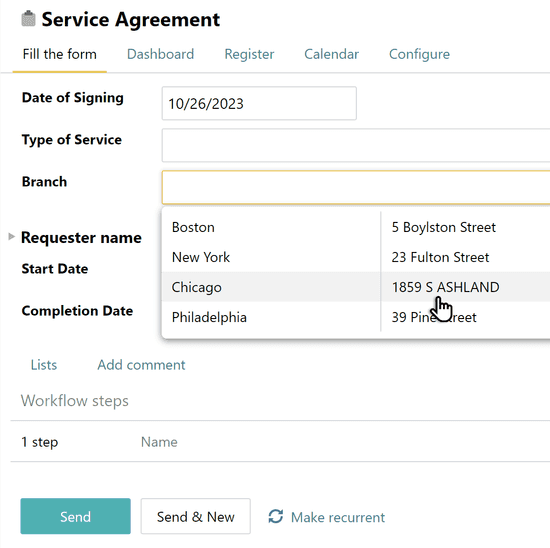
For the desired object to be displayed in print, add a ${Branch:3} variable to the print template. The address specified in the second column of the catalog form (e.g. 18599 A SHLAND.) will always be displayed on the print document.
In addition, the template can be filled in with information about an employee’s job title, department, email, and work phone. To do this, select the desired employee in the Contact field. For example, to approve vacation time, all you have to do is enter the employee’s name in the form, and their title and department will autofill in the print template of the request.
To do this, enter the variables ${Contact:position} and ${Contact:department} in the Contact field.You can also set the following parameters for this field:
- ${Contact:email};
- ${Contact:workphone};
- ${Contact:mobile}.
Important: Information about job title, department, work phone, mobile phone in the print template is only available to users from the same organization as the form owner.
To keep the Total field from sliding off of its placement in the template, use the variable ${Field_name:Total}.
Go to form configuration and find Print Templates. Click Add print template, then select the file with the ${Field type} variables.
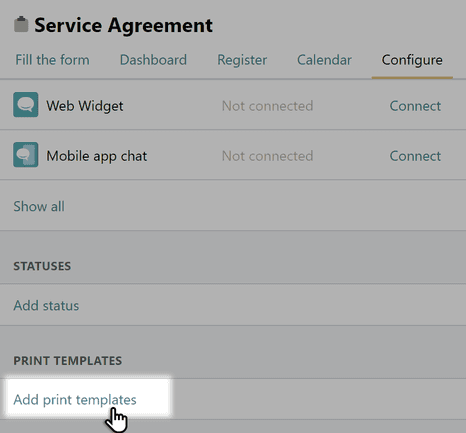
Upload a file with tamplate and hit Save.
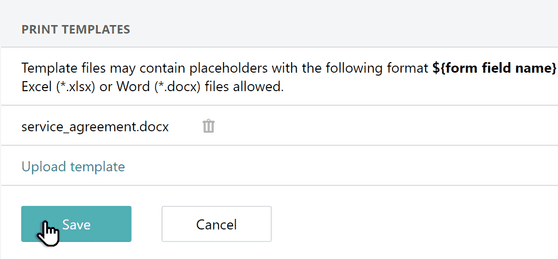
Note: Make sure that the sheet you want to use as a template is editable, not write-protected.
Click on Edit workflow to open the Template Editor. Make sure each variable has a corresponding field in the form, then check the variable names against the field names to make sure they match. If you find any differences, you can edit either the document template or the form template to fix them. More on the Template Editor.
Save the form. The print version of the service agreement is now ready.
Using print templates
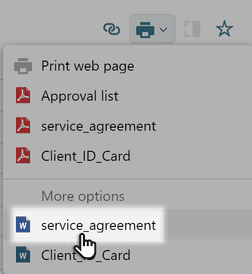
From now on, each Service Agreement form you fill out can be saved in PDF format. To do this, hit the printer icon in the upper-right corner.
You’ll get a properly drafted agreement ready to print or send out. If you want to make changes to the document before printing it, download it in its original format — .docx or .xlsx.
Pyrus Tip: You can upload different print templates to one form and use them when the situation calls for it. 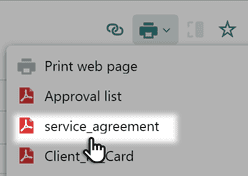
If a print template becomes outdated, download the current version from Pyrus and edit it.
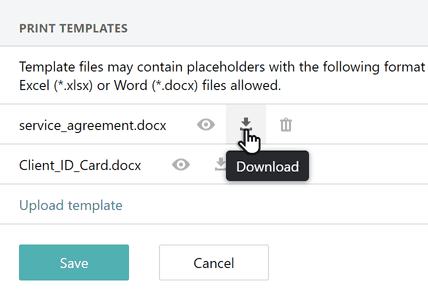
Click the trashcan icon by the template’s name to delete the previous version, then upload the edited template.
Handy tips
You can use Excel functions in your document template to run calculations, and the results will appear in the final print version. For example, you can automatically calculate the rental period or overall fee in a car rental agreement based on the dates and the daily cost.
 To calculate the rental period, we subtracted the start date from the return date. The actual number is automatically displayed in the print version:
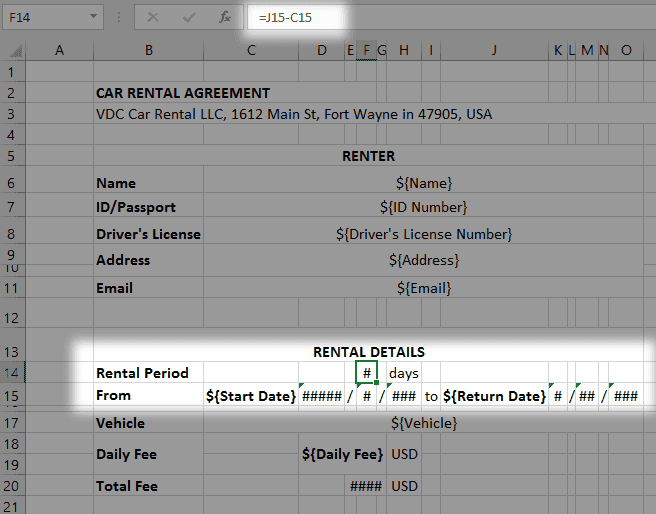
 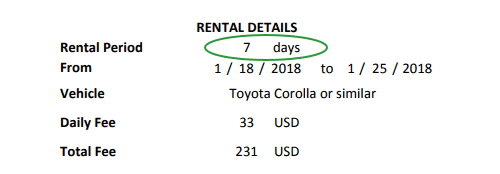 To make this work, we placed the ${Start Date} and the ${Return Date} variables in empty cells C15 and J15, and the formula J15-C15 in cell F14. To ensure that the dates are displayed correctly, we used the Excel functions =MONTH(C15), =DAY(C15), =YEAR(C15) and =MONTH(J15) =DAY(J15) =YEAR( J15). Then we placed them in the cells opposite “From” and “to”.
 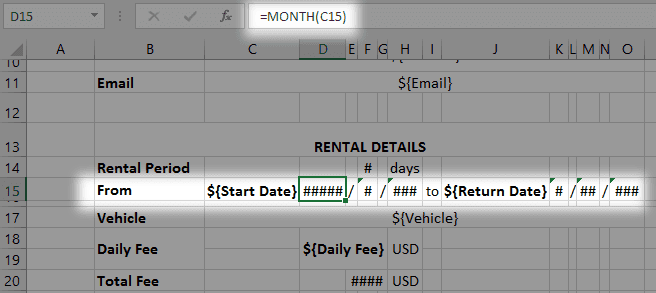 Finally, we made the ${Start Date} and ${Return Date} variable text white to prevent them from being displayed in the print version.
Make sure the cell formats in your Excel template correspond with the field types in your form template. For instance, set the Date format for dates and Currency for monetary figures. This transfers data accurately from the form to the print template, and your Excel formulas will work without a hitch.
One variable can only occupy one cell in Excel templates. There should be no spaces or other symbols before or after the variable, otherwise data may not be transferred accurately. In the image above, the ${Start Date} and ** ${Return Date}** variables are in individual cells C15 and J15.
If there’s no option but to place several fields into one cell, put these fields into separate cells first, then merge the fields in the row you want them displayed on paper with the following formula:
= "CAR RENTAL AGREEMENT No. "&D3&" dated this "&F3
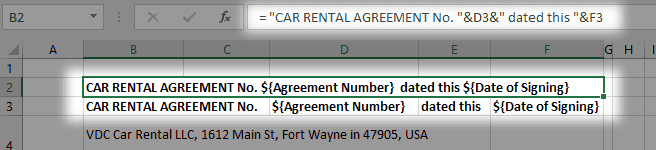 You only need row 2 to appear in the print version since this is where the data from the form will end up. Match the text in row 3 with your background color (probably white) so that it isn’t displayed in the final version of the document.
You can use data from the form to set conditions. For example, a user fills out an online car rental form and checks the box opposite the “Driver aged between 30-65” field. For the check mark to appear in the print version of the form, add the following condition to your Excel file:
= IF(E12=”Yes”;V)
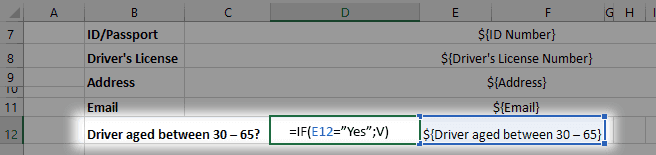 Don’t forget to blend the text in the cell containing the variable (in this case, E12) with the background so that it doesn’t appear in print.
Images like logos, QR codes, and document scans can also be transferred from forms to print templates. Just add the variable ${Files:PreviewFirst} to your print template where necessary. Note: If you plan on adding an image to an Excel document, make sure you expand the cell to fit the image first, as it won’t expand automatically.
 This variable will be replaced by the first image attached to the form.
Note: to ensure the image displays correctly in the printed template, upload files in JPEG, PNG, GIF, RTF, DOCX, CSV, or XLSX formats to the File field in a request. If you attach files in DOCX, RTF, or XLSX formats, an image of the first page of the document will be transferred to the template.
You can transfer table row numbering to the printed template using the ${Table Name#} parameter.