Service level agreement (SLA)
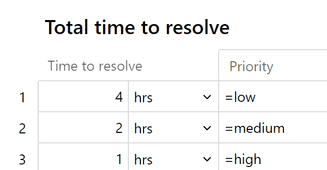
Setting the default time for processing of requests in Pyrus is easy. For example, the SLA states that the company must solve a client’s request within four hours of being contacted, or within two hours for urgent requests. The required time is set automatically for each request.
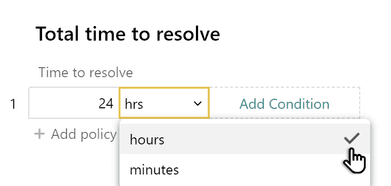
Pyrus Tip: client request processing time can be set not only in hours, but also in minutes. This helps to precisely set the service level for each type and condition of client request.
Setting processing time depending on request fields
SLA policies enable flexible setting of request processing time depending on the sender, priority level, request type, and any other information in the request.
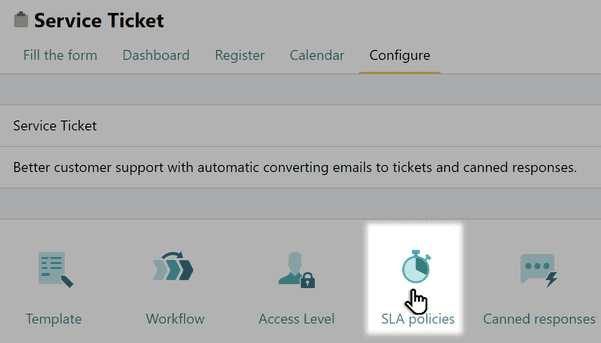
To configure the policies, open the service ticket form settings and hit SLA policies.
In the Total time to resolve block, press Add policy.

Set the number of hours or minutes provided for processing the request.
Press Add condition.

Select the field on which the processing time will depend, and set the policy for that field. In our example, the Priority field is selected, so the request processing time will depend on the urgency of the request.
Pyrus tip: to use Priority field for adding condition, do this:
Create a catalog of priorities.
Add the catalog of priorities to the service ticket form template.
There may be several policies or conditions for each request. If the conditions for several policies are being processed at the same time, the first one is applied.
Important: in tickets configured after the SLA policies have been set, the processing time will be determined by the set policies. If no policies are applicable to the ticket, the time can be set manually.
In current tickets, time that was set manually will be replaced with the time from the relevant SLA policies after the first change to the fields.
Calculating SLA time
By business days calendar
Say you’ve set the processing time to four hours, but the client reports the problem on a Sunday or holiday. The request won’t be processed within the allotted time, and it will go past deadline. To avoid this, set the time in the SLA settings according to the official work calendar in your country. That way, the SLA won’t count weekends, holidays, and off-business hours.
In the SLA settings of the selected form, in the business hours block, select Business days calendar and hit Save.
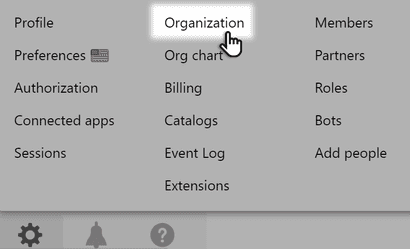
Pyrus Tip: If most of the client service processes in your company happen during standard business hours and days, you can set the SLA clock to Business days calendar once for all forms. To do this, go into the Organization section in the lower left corner of your screen.
Fill in the business hours, timezone, and work calendar block, and hit Save.
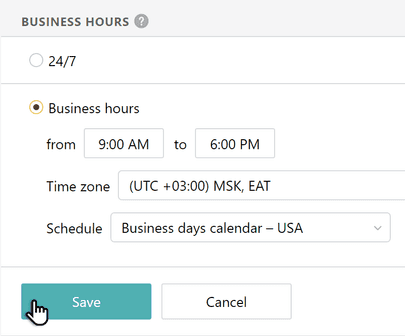
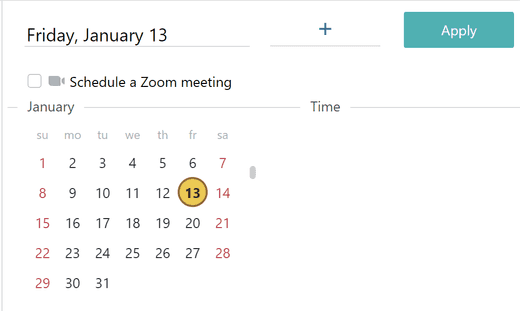
Now, the SLA will take into account the standard Work Calendar in your country, and weekends and holidays will be highlighted in red in the Calendar when setting request processing times.
By astronomical calendar
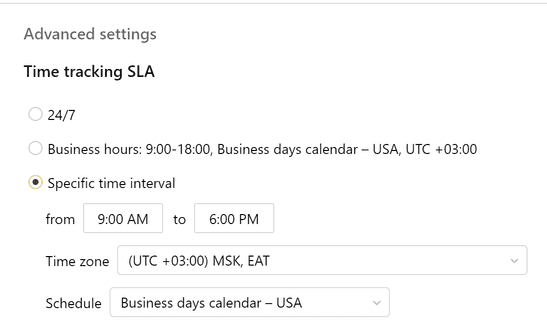
If there are processes that require you to process client requests outside of business hours, you can specify these in the form settings. Say your company has a branch in another timezone, which has to accept and process requests from 8 a.m. to 8:30 p.m., but the central office is only open during standard business hours.
To calculate the processing time of that branch’s employees correctly, set the required hours and timezone in the SLA settings of the form.

If you have clients who need 24-hour support, you can set the SLA to 24/7.
Setting deadlines for steps
A request is often routed to different departments, and sometimes even to different companies. If the entire task has the same deadline, the expiration may happen at the last step, even though the delay happened at a different step.
Setting deadlines at each step will help you determine which steps are actually problematic, as well as to calculate the KPI of employees participating in the processes.
Note: to set deadlines for each step, configure the form workflow.
Open the form settings and click SLA policies.
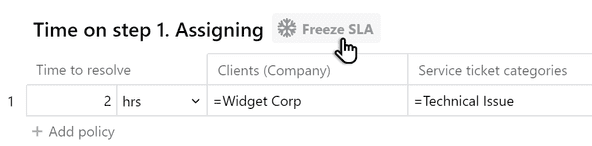
Under the name of each step of the workflow, press Add policy and specify the number of hours allotted for the request.
Select the condition on which the processing time will depend. In this example, the condition is: if the request came in from selected clients, and the service ticket category is technical issue, then it must be resolved within 2 hours.
Then, save the changes. In the settings configured after that setting, deadlines at the steps will be determined by added policies.
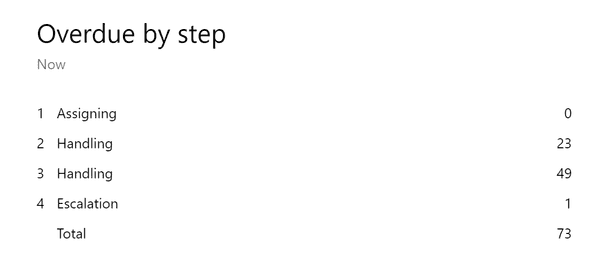
In the Time spent on each step section on Dashboard, you can filter requests that are late in the Overdue by step column. This will help you notice the delay in time and still make the overall deadline.
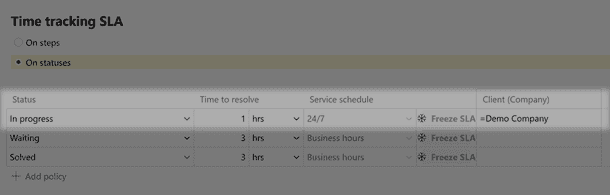
Setting deadlines for statuses
During the processing of a customer's request, the request goes through different stages — from initial contact to final feedback on your support team's performance. Each stage requires different turnaround times, response times, and so on.
For example, you serve customers with different SLAs: some require a response within an hour, 24/7, while others require a response within a business day.
For such requests, you can set up statuses with specific SLAs for each status — depending on the customer, country, request type, and so on.
Support staff can see the required SLA directly in the task, and managers can monitor deadlines for all customers in one place.
Freezing an SLA at a step or in a status
There are business processes where there is little the responsible party can do to effect the speed of issue resolution.
Say you’re waiting for a response from a client or partner. The waiting can last indefinitely, as you can’t do much to influence the actions of an outside party.
It would be unfair for a task you’re responsible for to go past a deadline due to a factor you have no control over.
In a case like this, it makes sense for the duration of this step not to count toward the overall task processing time. To make this happen, use the Freeze SLA function.
Note: just as for any changes to a form’s routing or template, or to the configuration of an integration with outside services, to connect the Freeze SLA function you need form administrator rights.
To turn on the function, go into the SLA settings section and select when the SLA rules will be suspended: 1) at a certain step of the request route; or 2) when the request is in a certain status.

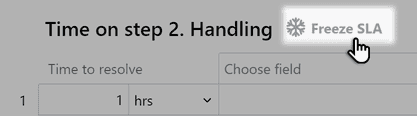
To stop the clock at a certain step, hit the Freeze SLA button corresponding to that step.
To freeze the countdown for a request when it’s in a certain status, select the status and press the snowflake flag corresponding to it.
As soon as the client replies or the request status changes, the clock will start again.
More about connecting automatic request status reset
Note: if the request is at a step or in a status where the SLA is frozen, it will not display the deadline, and it will not be highlighted in the registry.
Escalating a request to a manager
If you regularly have to involve a manager in requests whose deadline is approaching, connect the Escalation extension. Pyrus monitors approaching task deadlines and automatically includes the manager in the task at the appropriate moment as an approver.
- Go into the Extensions section in the lower left part of the screen.

Important! To access the Extensions section from a user profile, you need Organization administrator or Integrations manager rights.
- Click on the extension’s icon.

- Select the form relevant to the process that requires the attention of the manager as the deadline approaches.

- Hit Setting.

- Select the manager to be added to the task as a subscriber, and the time interval after which this will happen. This can be done for the total request deadline, or for each step of the request. You can also specify here that tasks with escalation are to be check marked so they can be filtered in the register for analysis.

- On the extension’s settings page, hit Activate.

FAQ
Why can’t I see statistics on requests that went pastdeadline in the report?
There is probably no Deadline type field in the client request form. Add the field to the form and set the default processing time, or configure automatic setting of the time from a script.
Why are there no statistics on specialists in the report?
For Pyrus to collect data on support team employees, the request form must contain a Contact type field. That’s where you specify the party responsible for processing the request.
Why doesn’t the report show how much time request processing takes?
If you don’t see data on the median request processing time and the median first response time in the report, connect your email to the form.