QuickBooks Online integration
Pyrus integrates easily with QuickBooks Online to more easily manage your invoice approval. The guide below will walk you through the steps necessary for configuring Pyrus to work with your QuickBooks Online account.
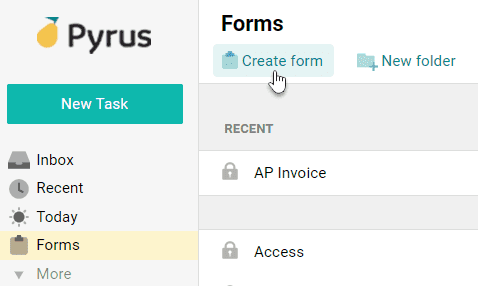
If you’re new to Pyrus, first create an AP Invoice form. Go to Forms and click on Create new form.
Click on AP Invoice.
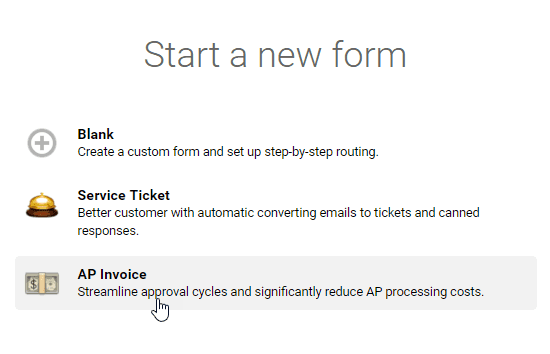
For more details on the AP Invoice form, please see the article Quick start.
Configuring your integration
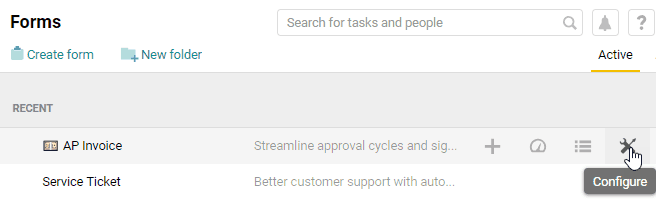
- Go to the Configure tab of your AP Invoice form.
- In the Accounting integration section, click on Set up accounting software.
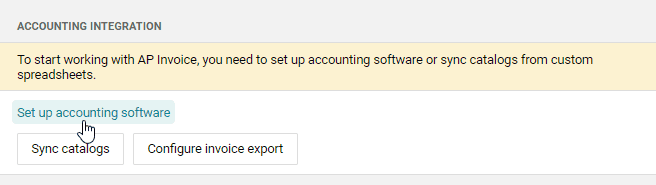
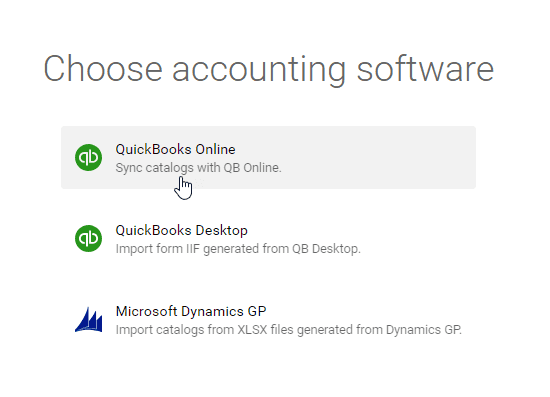
- Click on QuickBooks Online.
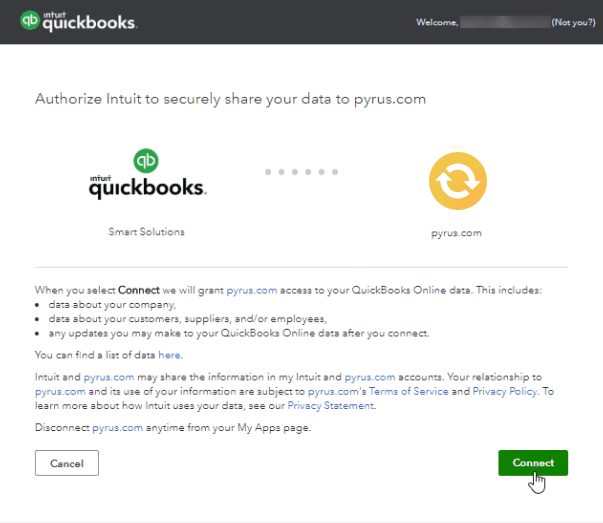
- Pyrus will then ask you to sign into your QuickBooks Online account. After signing in, you’ll need to authorize QuickBooks to share your company’s data with Pyrus. Click Connect.
Syncing catalogs
Pyrus will ask you if you want to import your QuickBooks Online catalogs. Select the catalogs you want imported, then click on Sync catalog.
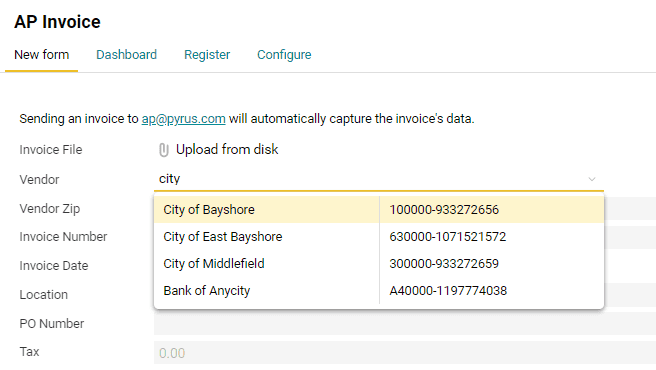
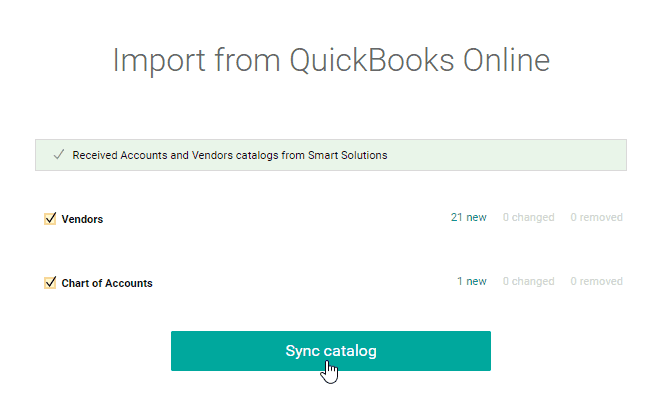 This lets you enter your vendors and GL codes into the Pyrus AP Invoice automatically, rather than enter them manually. When the import is complete, you can choose values from the dropdown menus and update them at any time.
You can find your imported catalogs in the form’s Configure tab, under Catalogs.

The catalogs will automatically synchronize with QuickBooks Online. Whenever you add a new vendor to your Vendors catalog in QuickBooks, it will appear in the corresponding Pyrus catalog as well.
Setting up your approval workflow
To set up your invoice approval process, go to the AP Invoice form’s Configure tab and click on Edit workflow.
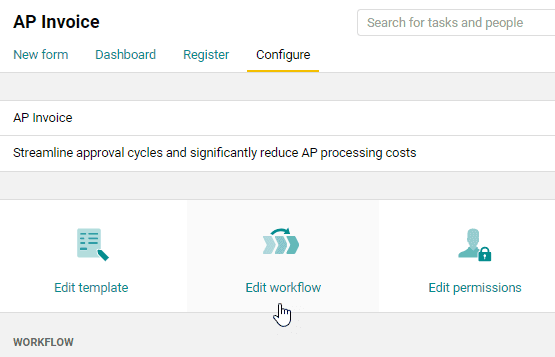
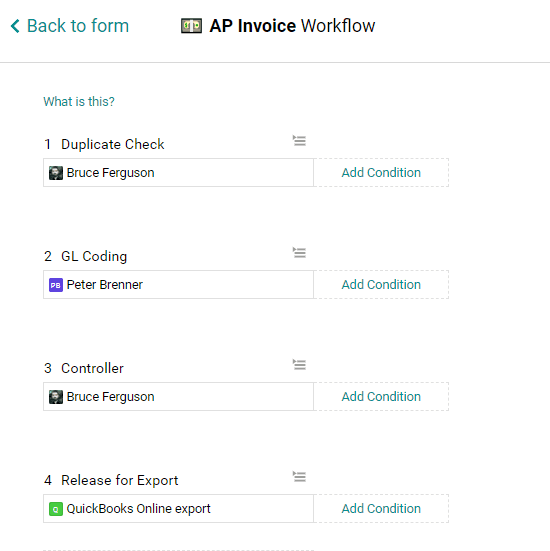
By default, the workflow consists of four steps — Duplicate check, GL Coding, Controller and Release for export. You can modify these steps to match your actual invoice approval process. You can add and remove steps, as well as add people or roles responsible for these steps.
If you’re new to Pyrus, see the article Configure the process for details on how to set up your invoice approval workflow.
Automatic invoice export to QuickBooks Online
Invoices will be exported to your QuickBooks Online account automatically as soon as they reach the final step of the workflow. In the example above, responsible for step four is QuickBooks Online export. This is a bot that automatically exports invoices to QuickBooks Online. When invoices are approved at the previous step (by the Controller, for example), the bot will automatically export it to your QuickBooks Online account and finish the task.
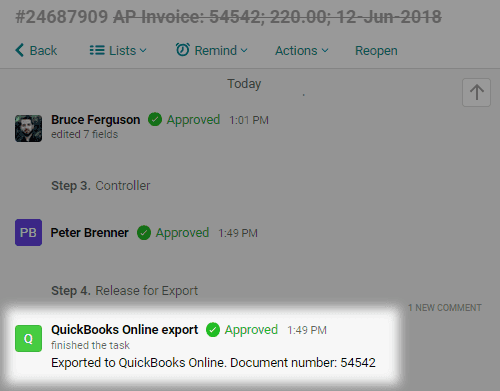
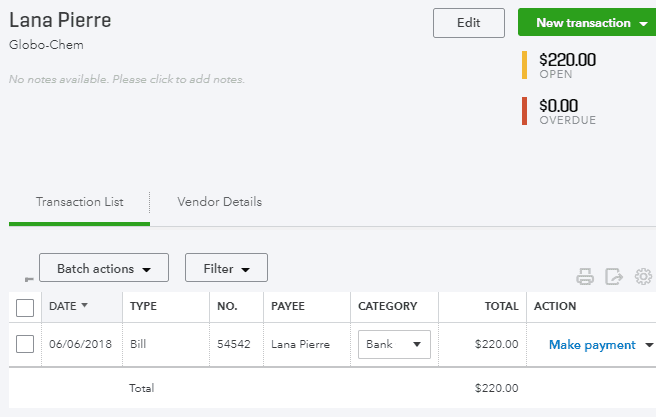
This is what the invoice from the example above looks like in QuickBooks Online:
Note: The bot appears in the workflow automatically when you set up the integration, so no additional action is required on your part. For export to work properly, the bot should remain at the final step of the workflow. You can add as many steps before the bot as your approval process requires.
Note: The QuickBooks "Simple Start" pricing plan doesn't support automatic invoice export.
Our software integrates with a variety of other software as well, so please contact us to make sure your needs are met.